How To Create A PowerPoint Template
This is a step-by-step guide on how to create a PowerPoint templateusing Microsoft PowerPoint. These steps are applicable regardless of whether you are creating the template in PowerPointfor Windows or for Mac.
It is a requirement that Microsoft Office or Microsoft 365 is installed on the computer that you are going to use to have access to the PowerPoint app.
Let’s now begin to create a PowerPoint template.
Step 1 – Open PowerPoint
- Check the desktop or taskbar and look for the orange-colored PowerPoint app logo. Depending on the version of Microsoft Office installed on the computer you are using, the logo – it has the uppercase “P” on it – may appear like any of these three:
- A square with a curved upper left portion and the orange-colored uppercase “P” inside it
- A partly opened folder-like logo, with the white-colored uppercase “P” inside the orange-colored square.
- A round logo with the white-colored uppercase “P” inside a small orange-colored square that partly covers the left side of the circle.
- Once you see the PowerPoint logo, click it to launch PowerPoint.
- If the desktop or taskbar is too cluttered with apps, then type “PowerPoint” – don’t include the quotation marks – on the search bar.
- When the PowerPoint app appears, click “Open” to launch PowerPoint.
Step 2 – Click “Blank Presentation”
The “Blank Presentation” is a white-colored rectangle located at the upper far left side of the PowerPoint home page.
Clicking it will open a new presentation.
Note: If you’re using PowerPoint for Mac to create a PowerPoint template, launching the PowerPoint might directly result in opening a new presentation. If that is the case, then ignore Step 2. Immediately proceed with Step 3.
Step 3 – Click “Design”
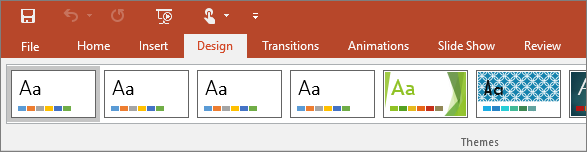
- You can find the “Design” tab at the top most part of the PowerPoint window.
- Choose a theme (the design) that you want for your slides.
- You can check how your slide will appear on a particular theme by simply clicking each theme or design.
On a personal note, this particular step on how to create a PowerPoint template is the most fun part for me. The more recent versions of PowerPoint you use, the more the designs get interesting.
Step 4 – Click “View”
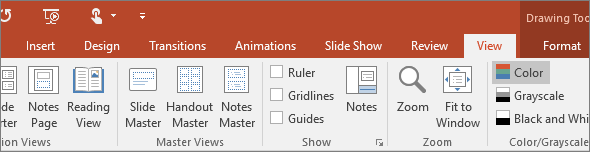
- The “View” tab is on the same row as the “Design” tab.
- The “View” tab is found right after “Review.”
Note: For Mac users, look at the top menu bar and you will find the “View” tab.
- Clicking “View” will open a toolbar below where the “View” tab is located.
- The “View” toolbar has many sections.
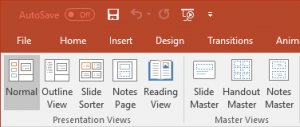
- The section at the extreme left is the “Presentation Views.”
- In the “Presentation Views” section, the fifth logo you see from the left is the “Slide Master.”
Note: If you’re using the 2019 version of PowerPoint, after “Presentation Views,” you will see the next section, “Master Views.” It has three logos, the first of which is the “Slide Master.”
Step 5 – Click “Slide Master”
Clicking it will take you to a new window.
Note: For Mac users:
- First, click “Master.”
- Then, click “Slide Master.”
Step 6 – Explore The Tabs On This Window
- Click the tabs that will suit your preferences.
- You may click “Slide Size” to change the size.
- You may click “Background Styles” to alter the color of the theme/design that you chose earlier.
- You may click “Fonts” to choose what font you want to use for a particular text.
You’re now through with the first six steps on how to create a PowerPoint template. A few more easy steps to go and you’ll be done in no time.
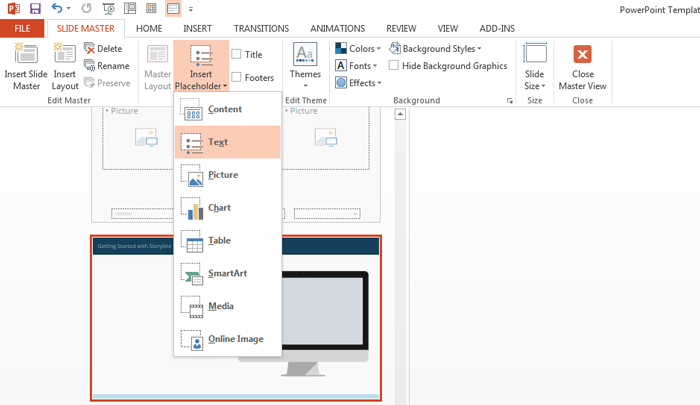
Step 7 – Click “Insert Placeholder”
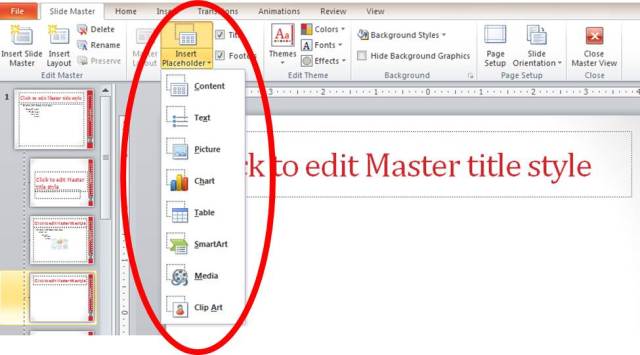
Now from the far-left side of the “Slide Master” tab, the second section is the “Master Layout,” right after “Edit Master.”
In the “Master Layout” section, you will see “Insert Placeholder.”
Clicking “Insert Placeholder” will make a pull-down or drop-down menu appear. In the exact order as they appear below, the following placeholders can be seen in the pull-down menu:
- Contents
- Click “Content” to insert a content outline.
- Text
- Click “Text” to insert a text box.
- Picture
- Click “Picture” to insert a section in the template where you want to put a picture.
- Chart
- Click “Chart” to insert a section for a chart.
- Table
- Click “Table” to insert a section for a table.
- SmartArt
- Click “Smart Art” to insert a section for any item found in SmartArt.
- Media
- Click “Media” to insert a section for a video clip.
- Online Image
- Click “Online Image” to insert a section where you can place an
online photo or image.
Step 8 – Choose One Placeholder
Pick from the ones that appear in the pull-down menu of “Insert Placeholder.”
- For example, you chose “Text.”
- Click “Text.”
- The mouse cursor will start to appear like a cross or something like this one “+” but slightly bigger, with all ends looking like the tip of an arrow.
Step 9 – Choose A Location
- Move the mouse until that “cross” reaches the slide and stop only at a section of the slide where you want to put the placeholder you selected.
- To change the size of the placeholder:
- Click it.
- Circles will appear on its outline.
- Point the cursor of your mouse in any of those circles and then drag your mouse to change the size as you please.
- To change its location:
- Point the mouse cursor on the shape’s outline.
- When the “cross” (+) appears again, drag it anywhere in the slide.
- Stop in the particular section in the slide where you want it to be placed.
- If you need to relocate it again for several times as the need arises, just do the previous procedures.
At this point, you have almost completed the whole procedure on how to create a PowerPoint template. The next step is just to make sure that you will not lose the template you have just made.
Step 10 – Click “File” To Start Saving Your Work
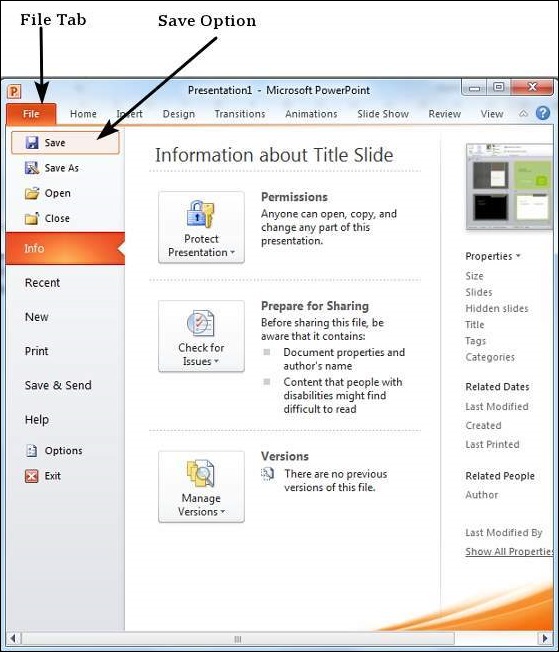
Once you think you are done applying all the changes you want, it’s time to save your work on your computer.
- The “File” tab is at the upper left corner of the window.
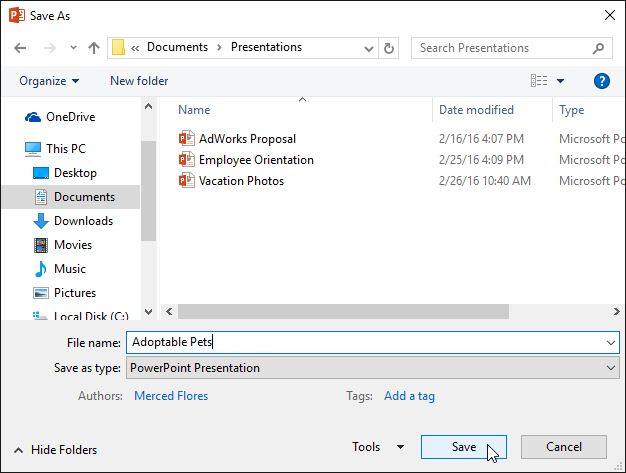
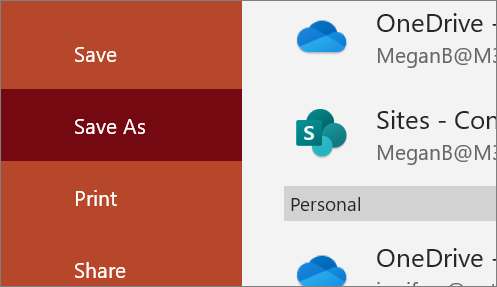
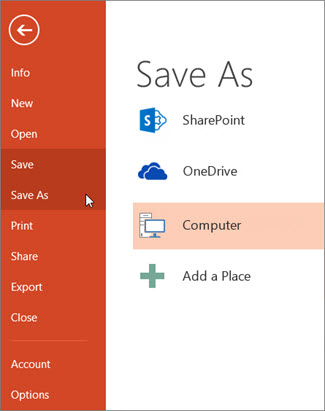
Step 11 – Click “Save As”
A new window will appear.
- At the “File Name” section, type the name you want for your PowerPoint presentation.
- If you find a name appearing on that section, simply delete it and replace it with the name that you want.
Step 12 – Click “Save”
Now you’re done making a template.
The steps on how to create a PowerPoint template could be daunting at first, but learning this basic process will help you as you further explore the PowerPoint app in making beautiful presentations.
About The Authors

Steve MartinsI am a certified graphic designer and I earned my bachelor’s degree in Communication Design. I worked with many brands like Uniqlo and Huawei but also independent smaller Barcelonian brands like Caravelle and Madrid’s Hola Coffee and I have completed over 2000 projects in the last 5 years.