Have A Spooky Halloween With These Pumpkin Carving Templates
It's that time of year once more. It's time to organize a pumpkin carving party and design some lovely decorative patterns. Whether you want to use them to embellish pumpkins on your porch, front steps, or mantle, we have the perfect pumpkin pattern for you. This pattern, a simple daisy print, is ideal for beginning pumpkin carvers. With a few easy steps, these cheery templates will instantly brighten up any pumpkin display.
These pumpkin templates, which are available for free download and printing, can assist you and your family in creating brilliant designs that are sure to be the talk of the neighborhood. From a comical ghost or monster pumpkin with a non-spooky smile to phrases and sayings brimming with Halloween energy, these easy pumpkin carving stencils will have you looking like a pumpkin carving pro in no time. With so many printable pumpkin carving templatesto choose from, you're certain to discover the right one. Is there no time for carving? Alternatively, you might try one of our pumpkin carving templates.
What is your Halloween plans this year, given that it's traditionally a carnival of horror and spookiness? It's going to be supersonic, unearthly, and psychotic, that much is certain. Every year, awareness and festivities move up a notch because it's the most looked forward to event of the year for children, youth, and adults in equal measure. Tell us about the spooky things you do on Halloween and how you mark the occasion. I hope you all have a wonderful time carving pumpkins, baking cupcakes, trick-or-treating, handing out candy, and shopping for Halloween gift baskets for your friends, family, and other loved ones.
So they know you're there when everything goes black and hollow. Also, go see horror movies with your friends, scare the hell out of them, play truth/dare, impersonate creepy and outrageous movie characters, put on the avatars of zombies, vampires, and Draculas' to show the true essence of Halloween, and educate the little kids in the house that this event is meant to be enjoyed by all of us, and not just sitting at home by the fireside eating pumpkins. On Halloween, stay away from bad and malicious activities, and don't believe any story you hear.
Every Halloween party may become one of the best Halloween parties if you know how to prepare it all so that it is interesting until the very last minute. Furthermore, pumpkin carving is a serious job that necessitates your time, effort, and interest. If you don't feel like carving pumpkins because, well, that can be difficult to manage, or if you've ever doubted your drawing and carving skills, know that we have you covered and will help you organize the best Halloween party this year, provided that everyone has been vaccinated, washed their hands, and is wearing masks while you're partying.
So, are you prepared? Naturally, you are! Continue reading because we are about to reveal a few simple parties and pumpkin carving suggestions, as well as our new, free and terrifying pumpkin carving templates 2020 that you must use.
First and foremost, how do you want to enjoy this year's Halloween party? Do you want to keep it simple because most of your family members, friends, and colleagues may not attend because we must maintain social distance? Or do you prefer it to be as it should be - like a party? In all circumstances, you will also need to select and finish a theme. Is it extremely frightening? Adorable? Scary and adorable? It's entirely up to you, but after you've decided on a theme, make sure that your decorations, particularly the carved pumpkins, are in keeping with it.
Create adorable (or frightening!) Halloween pumpkins that will please trick-or-treaters using these simple pumpkin templates as a starting point. If you're looking for inspiration for your own creations, these free pumpkin stencils range from simple to complex. Simply cut out your preferred pumpkin carving template and trace it. Once you're ready, it's time to get creative with your pumpkin carving!
10 Pumpkin Carving Templates
Wide Smile Template
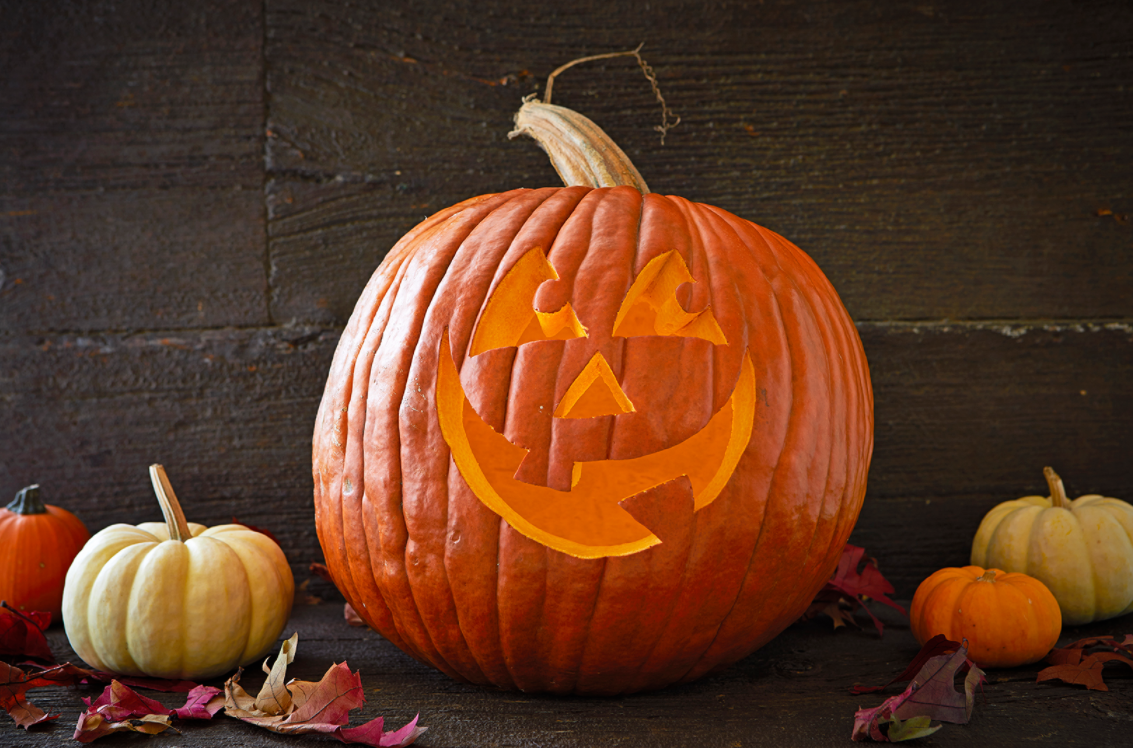
When you're carving, smile, exactly like this novice pumpkin template. This grimy pumpkin face stencil is a great place to start if you want to make a whole bunch of silly jack-o'-lanterns. For the ultimate Halloween display, set up the joy all around you.
Frankenstein Pumpkin Template

Let's be honest: this guy is a jerk. But we still adore him! To use, open the pattern and print it. If necessary, use a copier to enlarge the carving pattern. Before carving, tape the design to your pumpkin and puncture the outline of the pattern with a pin.
Owl Template
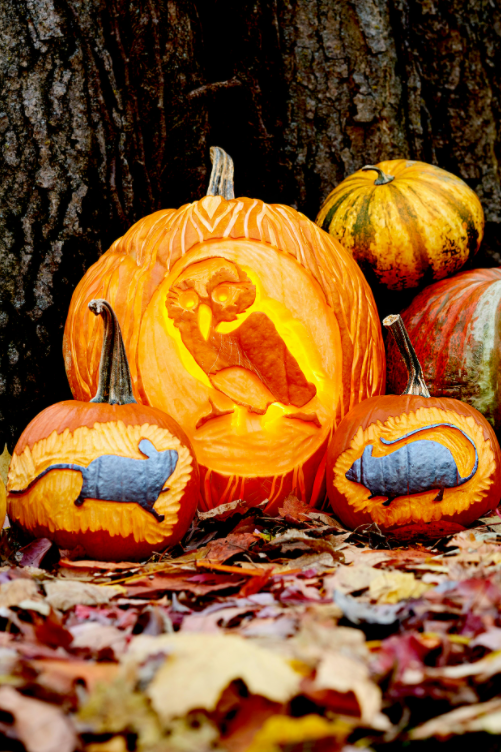
It'll be a hoot making a fowl pumpkin with this stencil. The bright-eyed template only requires etching along the pumpkin's face—no carving is required. If this design is too frightening for you, carve a beautiful owl pumpkin instead!
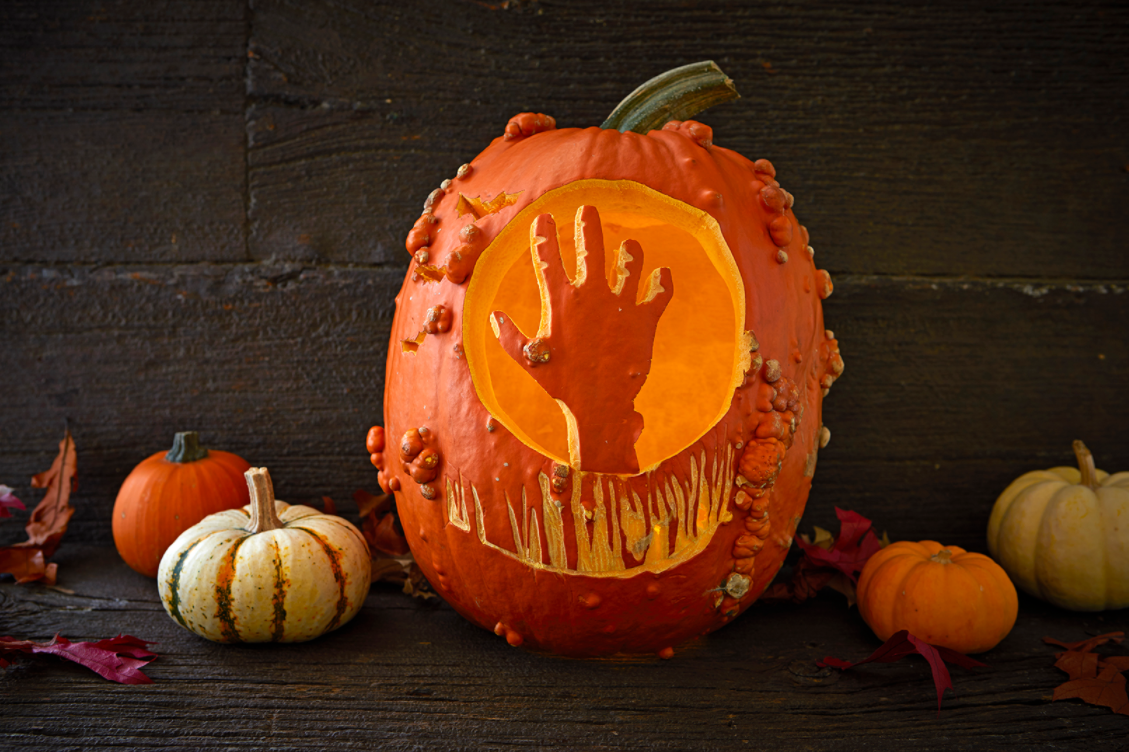
Snake Pumpkin Carving Template
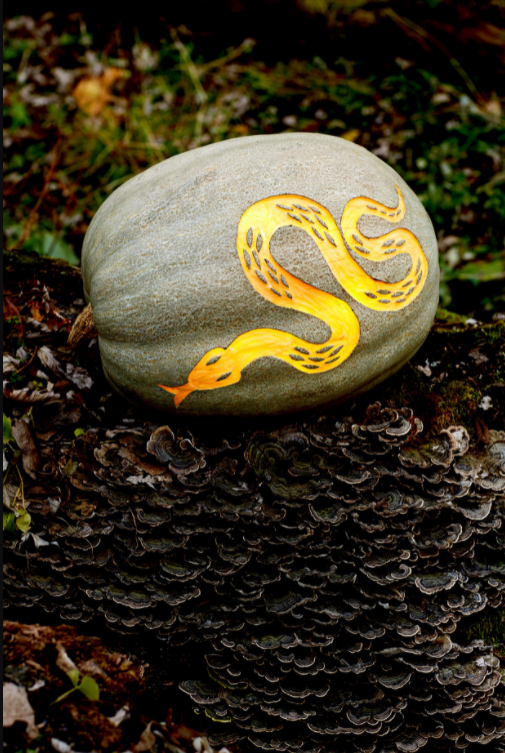
This snake pumpkin carving is actually created by etching a pattern into the body of the pumpkin. Create the design using our free pumpkin carving template. Once you've mastered the method, experiment with creating multiples to create an unsettling Halloween display.
Scarecrow Template
More than just the birds will be scared away by this spooky pumpkin face. During the Halloween season, this carving design lends itself to an evil-eyed, illuminated guard by your front door.
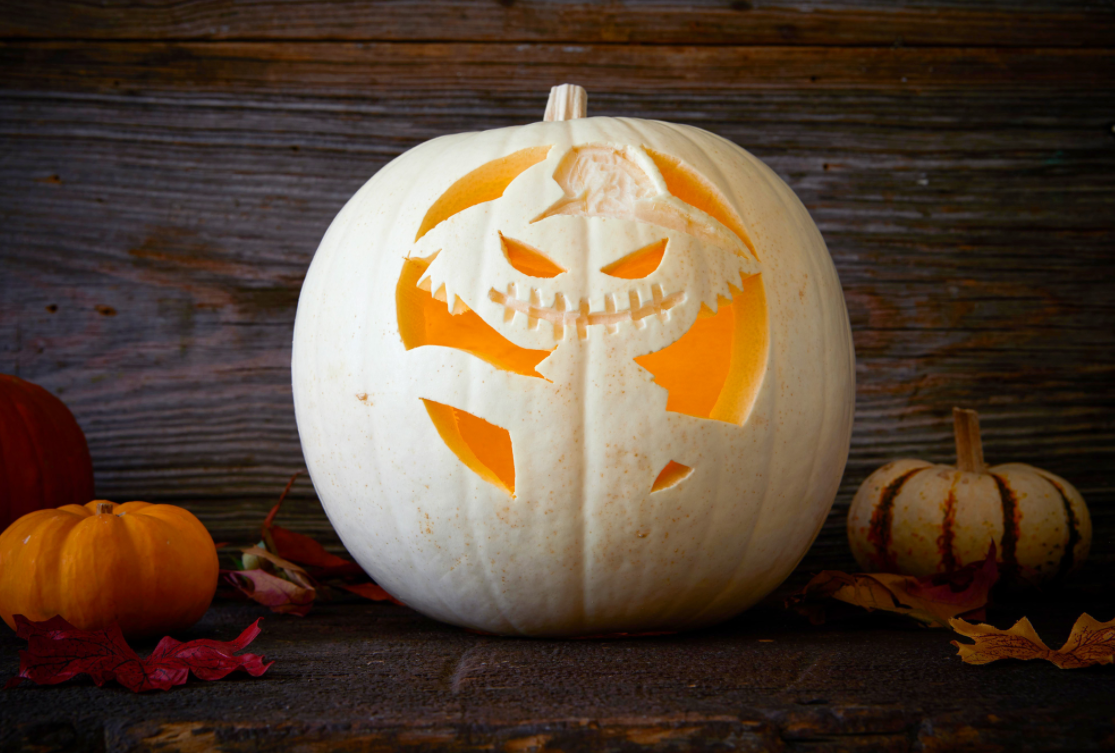
Zombie Pumpkin Carving Template
More than just the birds will be scared away by this spooky pumpkin face. During the Halloween season, this carving design lends itself to an evil-eyed, illuminated guard for your front door.
Crow And Tree Template
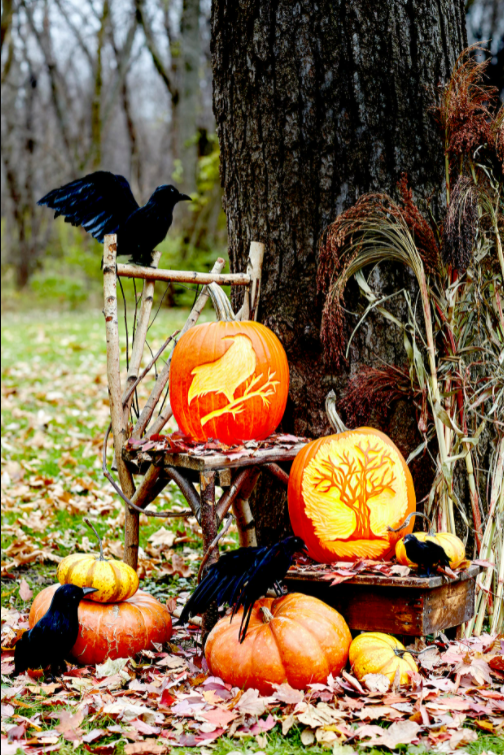
With these crow and tree pumpkin carving templates, you can create a terrifying Halloween forest on your front porch. A scattering of plastic crows and stacked pumpkins completes the tableau.
Skull Pumpkin Carving Template
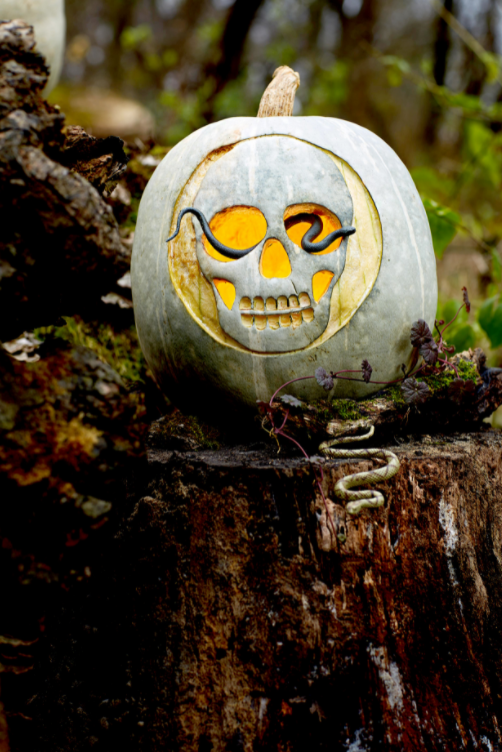
With this free skull pumpkin stencil, you can carve a spine-chilling Halloween jack-o'-lantern. Carve the face shapes and make the teeth with a basic etching process. Thread a rubber snake between the eyeballs for a genuinely eerie effect.
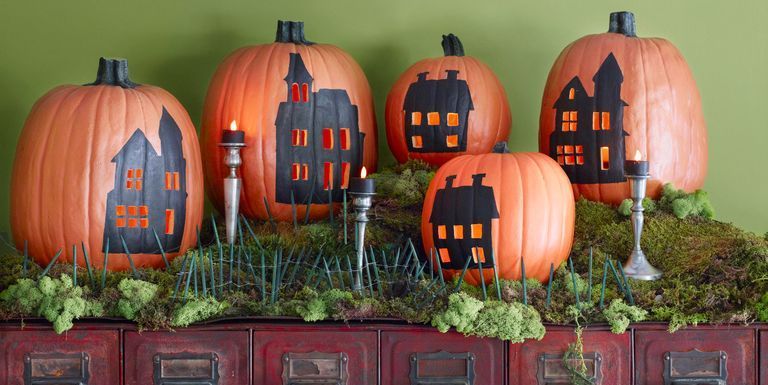
Cottage Pumpkin Template
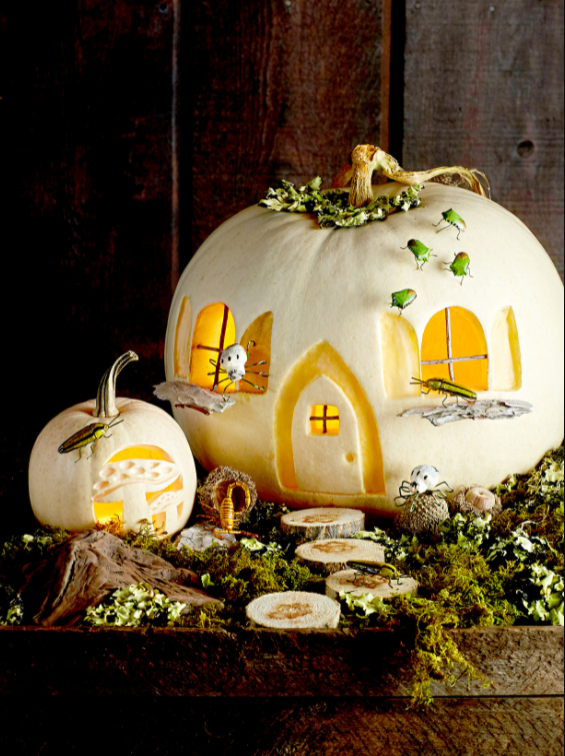
With this cottage pumpkin stencil, create a lovely Halloween display. Simply etch and carve two windows and a door to build the gorgeous house. Add a carved mushroom pumpkin and a few imitation bugs to complete the display.
Deer Template
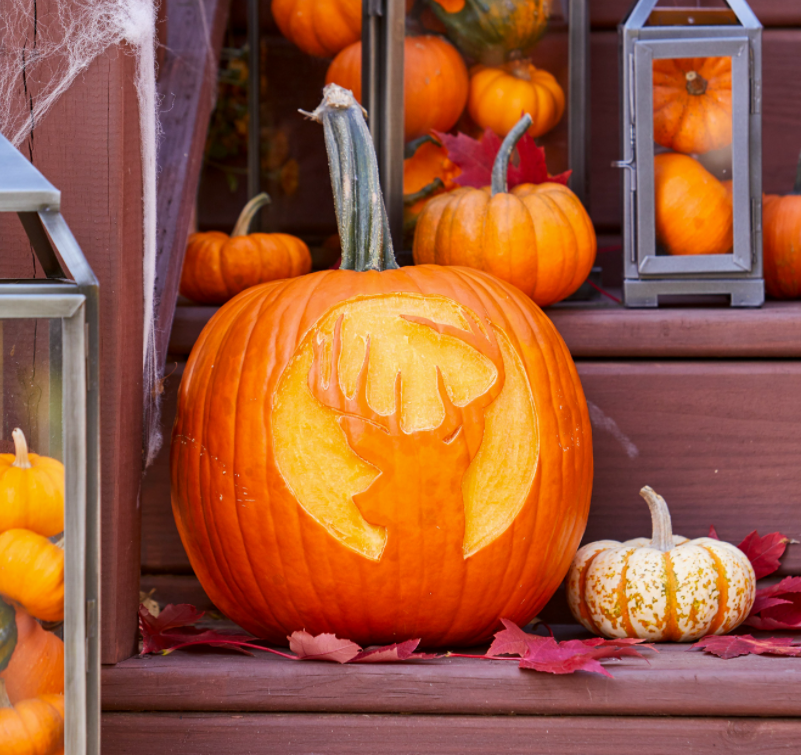
When it comes to picking a pumpkin face to carve, don't be a deer in the headlights. On Halloween, a full moon makes for a bright stroll in the woods for a buck. This basic pumpkin template only takes a simple etching method.
Where Can I Find Pumpkin Stencils?
There’s a lot you can find online! We have enumerated some samples here in this article that you and your family can use and print out to carve some for your next Halloween party.
What To Use To Draw On A Pumpkin?
One of the most well-known Halloween pastimes is pumpkin carving, which is enjoyed by people of all ages. However, because carving a pumpkin can be difficult or dangerous, some people prefer to use other materials to decorate it, such as jewels or paint. Continue reading to find out how to decorate a pumpkin without using any carving tools at all.
Pumpkin Painting
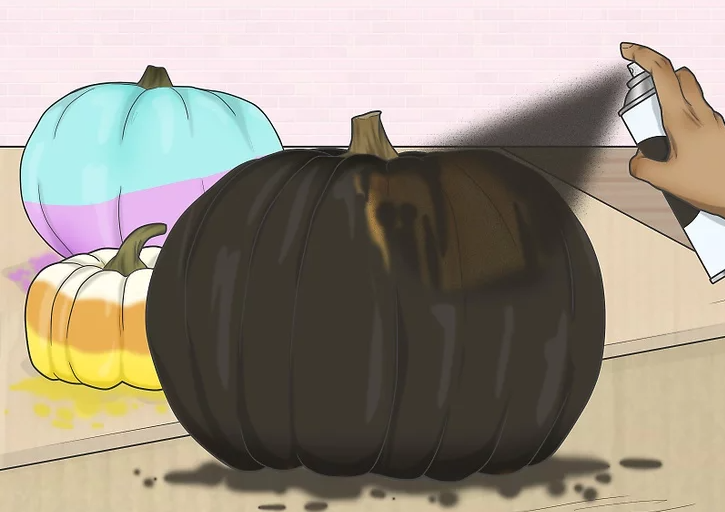
- If you want to change the color of a pumpkin, spray paint it. Allow the pumpkin to dry after wiping it off with a moist cloth. Bring the pumpkin outside and grasp it by the stem. Apply a light, even coat of acrylic spray paint, let it dry for 15 to 20 minutes, then repeat. Allow at least 24 hours before exhibiting the pumpkin.
- Read the spray paint label to determine how far away from the surface you should hold the can. In most situations, it is between 8 and 10 inches (20 to 25 cm).
- Make candy corn out of a triangle pumpkin by painting the bottom orange, the middle yellow, and the top white.
- Mask off half of a pumpkin using painter's tape to make a color-blocked pumpkin. Paint the pumpkin any way you like, let it dry, and then remove the tape off.
- To make a simple design, use sticky stencils. Wipe down the pumpkin with a moist cloth first, then let it dry. Apply an adhesive stencil to the pumpkin, then spray paint the stencil. Allow the paint to dry before applying a second coat.
Allow the paint to dry completely before removing the stencil.
- If you don't want to use spray paint, you can use acrylic craft paint.
- You can use either conventional or reverse stencils. You may even make your own out of contact paper or an adhesive shelf liner.
- Pin a paper doily to the pumpkin before spray painting it for a more complex pattern. Before the paint dries, remove the pins and doily.
- If you want a unique aesthetic, scrape designs into spray-painted pumpkins. Apply black acrylic spray paint on a real pumpkin (not a fake craft pumpkin). Allow the paint to dry before scraping designs into it with the handle of a spoon or fork. You are free to make any design you desire. For instance:
- Jack-o-Lantern faces
- Geometric patterns
- Flourishes and scrolls
- Spooky messages
- Glow-in-the-dark paint is a great way to add color to a spray-painted pumpkin. To begin, spray paint your pumpkin with white, black, purple, or dark blue paint. Allow the paint to dry before adding designs with glow-in-the-dark paint.
- If your porch will be illuminated by a black light, consider using UV or blacklight paint instead. It's available in craft stores during the Halloween season.
- Use acrylic craft paint or dimensional/puffy paint to create this effect. Bear in mind that the latter takes significantly longer to dry.
- Directly on your pumpkin, paint designs. This can be done on a raw pumpkin or one that has been spray-painted a different color. Create your own, unique design with a thin, pointed paintbrush and acrylic paint. If you're concerned about making a mistake, use a light-colored, washable marker to draw out your design.
- Consider simple patterns such as zigzags, polka dots, or stripes.
- Create Halloween-themed figures like bats, black cats, skeletons, and witches.
- On your pumpkin, paint a Jack-o-Lantern face. This can be accomplished with either black or yellow paint.
Drawing And Writing On Pumpkins

- Simply use a black permanent marker to draw your designs for a clean effect. First, use a light-colored washable marker to sketch out your design. Wipe away any errors you make with a moist cloth. A black paint pen or permanent marker will work well once your design is complete. Everything from Jack-o'-Lantern faces to geometric patterns and fanciful flourishes can be made with this technique.
- If you want a more elaborate design, paint your pumpkin first. Two layers of black spray paint on a pumpkin. Allow the paint to dry completely before drawing designs on the pumpkin using a white paint pen. Alternatively, you can paint the pumpkin white and then use a black permanent marker or black paint pen to draw on it.
- Tap lightly on a piece of paper with the paint pen until the paint comes out of the tip after shaking it vigorously.
- Change your message by transforming a pumpkin into a chalkboard. Paint your pumpkin with blackboard paint following the manufacturer's instructions. Allow the paint to set and dry. Rub chalk over it and then remove it with a dry cloth. With chalk, write or draw whatever you want on the pumpkin.
- It is preferable to use a phony DIY pumpkin. This way, you can use it all year!
- Use thumbtacks to create a custom message. If you want to spray paint your pumpkin, do it first and let it dry. To get started, use a light-colored washable marker to write a simple word like "BOO!". Use the provided lines as a guide to place gold or silver thumbtacks in the pumpkin. Make sure the tacks are touching when you place them close together.
- You are free to use any font style you like, even cursive.
- Thumbtacks in two or three rows will thicken the lettering.
- Multiple pumpkins can be used to spell out a single word. Select one of the above-mentioned decorating methods and apply it to make a single letter on each pumpkin. Arrange the pumpkins in a way that the word "BOO!" is spelled out.
Gluing Items To Pumpkins
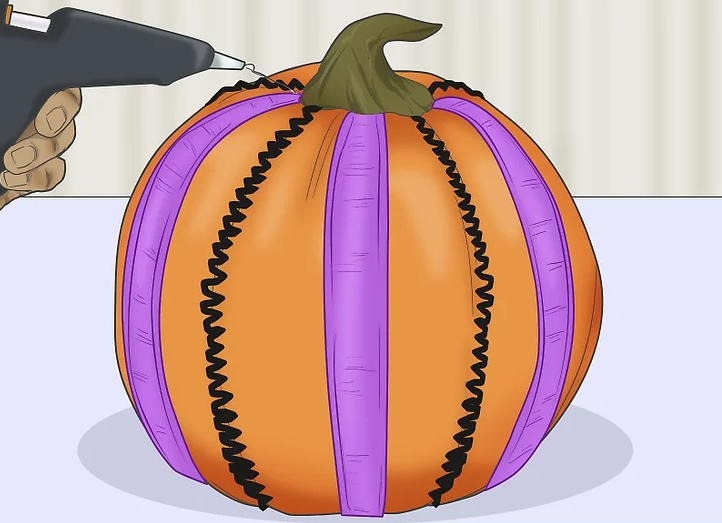
- For a simple look, hot glue rickrack and grosgrain ribbon along the ribs. Each piece should be hot glued to the vertical ribs (indented lines) of your pumpkin. Start at the top and work your way down the pumpkin, trimming any excess rickrack or ribbon.
- For a more colorful look, get some rickrack and grosgrain ribbon in a variety of colors and designs.
- To make the pumpkin more intricate, stack narrow trims on top of wider ones.
- If you want to create a more elaborate pumpkin, use hot glue to adhere rhinestones. Select a faux craft pumpkin from the craft store and, if wanted, spray paint it a different color. Allow the paint to dry completely before adding the rhinestones. Additionally, you may use strands of sequin trim to make designs such as phrases, spirals, and polka dots by hot gluing them together.
- You may also use a genuine pumpkin, but first, wipe it down with a moist cloth to remove any surface debris.
- For a rustic-chic effect, wrap lace around the center of the pumpkin. Find lace trim in white or black that is 2 to 3 inches (5.1 to 7.6 cm) wide. Cut a strip of fabric long enough to wrap around the center of your pumpkin. Using hot glue or fabric adhesive, adhere to the lace on the pumpkin.
- For a frightening appearance, layer black lace on top of a white pumpkin.
- To make the lace stand out, spray paint the pumpkin first!
- If you prefer to scrapbook, decoupage paper onto a pumpkin. Buy patterned paper with huge designs, like flowers or birds. Cut out the designs. Using decoupage adhesive, adhere the paper to the pumpkin until the entire surface is covered. Apply a final layer of decoupage adhesive to the pumpkin.
- For a festive look, glue tissue paper autumn leaves to a pumpkin. On red, orange, and yellow tissue paper, trace autumn leaves. Leaves should be cut out and then adhered to the pumpkin with decoupage or tacky glue. Coat the leaves with a second layer of adhesive to secure them in place, and then allow everything to dry.
- By brushing the leaves inward from the outside borders with a coarse-bristle brush, you can create realistic veins. Carry out this procedure while they are still damp.
- For a more upscale appearance, trace leaves onto silver "fancy foil wrap." This item can be found in the baking department of a craft store.
- If the shape of the leaves is too complicated, you may simply cut various colored tissue paper into little rectangles or squares and adhere them to your pumpkin using Mod Podge.
- Create a centerpiece by drilling holes in a pumpkin and then adding flowers. Reduce the size of your preferred flowers to 2 inches (5.1 cm). Drill holes in a genuine or faux craft pumpkin and insert the cut flowers. Utilize a variety of flowers, large, medium, and little; they can be real or faux.
- Utilize dark, neutral, or autumn-inspired hues such as crimson, orange, yellow, brown, teal, or plum.
- Fall flowers to consider include dahlias, mums, sunflowers, and yellow daisies. Spring flowers such as tulips and daffodils should be avoided.
- You can arrange the flowers in any design you like, as long as they are touching when they are close together.
- To make a gorgeous, gilded design, apply gold leaf to a fake pumpkin. Cover the surface of a faux handmade pumpkin with clear craft glue. Pick up pieces of gold leaf with tweezers and smooth them down using a soft-bristled paintbrush. Allow the glue to dry before smoothing the surface with a soft cloth.
- In the craft store, you can purchase gold leafing kits. They are available in three different metals: silver, gold, and copper.
- A real pumpkin can be used, although it will deteriorate over time. Using real gold leaf on a pumpkin would tarnish quickly, so it's wiser to use a faux craft pumpkin instead.
About The Authors

Steve MartinsI am a certified graphic designer and I earned my bachelor’s degree in Communication Design. I worked with many brands like Uniqlo and Huawei but also independent smaller Barcelonian brands like Caravelle and Madrid’s Hola Coffee and I have completed over 2000 projects in the last 5 years.