Roblox Template Shirt 2021: Top 5 Easy Steps To Follow To Successfully Create, Design, And Sell Shirts
How Do You Make A Shirt Template On Roblox?
T-Shirt Stickers
A t-shirt, which is essentially a picture placed to the front of an avatar's torso, is the simplest (but most restricted) apparel design. Create an image (preferably 512512 pixels) and submit it to Roblox to produce a t-shirt.
Pants And Shirts
Shirts and pants, unlike t-shirts, wrap all the way around an avatar's body, allowing you additional creative freedom. To begin, print out the clothes templates below and sketch your own designs on top.
Save the photos by right-clicking them and selecting Save Image As... to make a copy of the templates on your PC Notice how the components are "folded up" and wrapped around a Roblox character's body, limbs, and legs on each template. The following are the dimensions for each template part:
Shape Size (width × height) Clothing Parts
Large square 128 × 128 pixels Front and back of torso
Tall rectangle 64 × 128 pixels Sides of torso (R, L)
Sides of arms/legs (L, B, R, F)
Wide rectangle 128 × 64 pixels Top and bottom of torso
Small square 64 × 64 pixels Top and bottom of arms/legs (U, D)
Open a template in your preferred image editor; free alternatives include GIMP and Paint.NET.
Create a piece of clothing and then post it to Roblox. For translucent zones, 8-bit alpha channels can be used.
Notes / Restrictions: The upload procedure will fail if your picture is not the precise measurements of the design – 585 pixels wide by 559 pixels height. By design, certain avatars, such as Knights of Redcliff: Paladin, do not allow for clothes.

Design Points To Think About
The templates have certain limitations when it comes to adding clothes to R15 avatars in Roblox. Here are some examples of how to design shoes on a trousers template correctly and incorrectly.
Fees For Uploading And Selling
You must first pay a charge to upload or sell specific products. When an item is first submitted, before it is moderated, an upload fee is paid. When an item is initially declared "for sale" and made accessible for purchase by other users, a selling charge is paid.
Clothing Evaluation
Clothing may be checked for free in the following ways:
Open the Plugins tab in Studio and choose Build Rig.
From the popup menu, select a rig type. A “Dummy” avatar should appear in your workplace as a result of this.
Hover over the Dummy item in the Explorer window, click the button, and then enter a ShirtGraphic (T-Shirt), Shirt, or Pants object, depending on your outfit type.
Inside the dummy, find and pick the new Shirt Graphic or Clothing item.
Locate the corresponding property in the Properties window as follows:
Select the picture you submitted to Roblox by clicking inside the property's row. This will apply the clothes on the dummy avatar and show you how it appears. Make sure you test your clothes on a few different rig types to ensure it looks nice on as many avatars as possible.
The Uploading Procedure
You may post the clothing item to Roblox once you've finished and tested your design.
To get started, go to the Create page.
Depending on your design, select Shirts, Pants, or T-Shirts from the left column.
To pick your template file, click Choose File in the window's main section. Keep in mind that your image must be precisely 585 pixels wide by 559 pixels height, or else the upload will fail.
Make a unique name for your item.
Then press the Upload button. The item will appear as one of your creations once it has been approved by Roblox and may be applied to your avatar or sold to other Roblox users.
Is Creating Shirts On Roblox Free?
You may dress your avatar in amazing outfits! To sell your clothing designs, you must be a member and have made at least one piece of apparel. Read the Avatar Shirts and Pants wiki article for further information on how to make clothes.
Go to the Create area of the site, which is found in the blue bar at the top.
Depending on your design, select Shirts, Pants, or T-Shirts from the left column.
To sell an item, click the gear to the right of the item.
Select Sales after clicking Configure.
On the Sales page, select "Item for Sale" from the drop-down menu.
Enter the amount of Robux you'd want to sell your clothes for.
Save your work by using the Save button.
Important Notes:
A membership is required for your account, however you can create a T-shirt for personal use without one.
Clothing cannot be sold for free; the minimum quantity for Shirts/Pants is 5 Robux, and the minimum amount for T-Shirts is 2.
Robux earned through clothing sales are held in a pending state for up to seven days before being credited to the account. Escrow is the term for this pending condition. View the Summary of your Transactions to see how much Pending Robux you have.
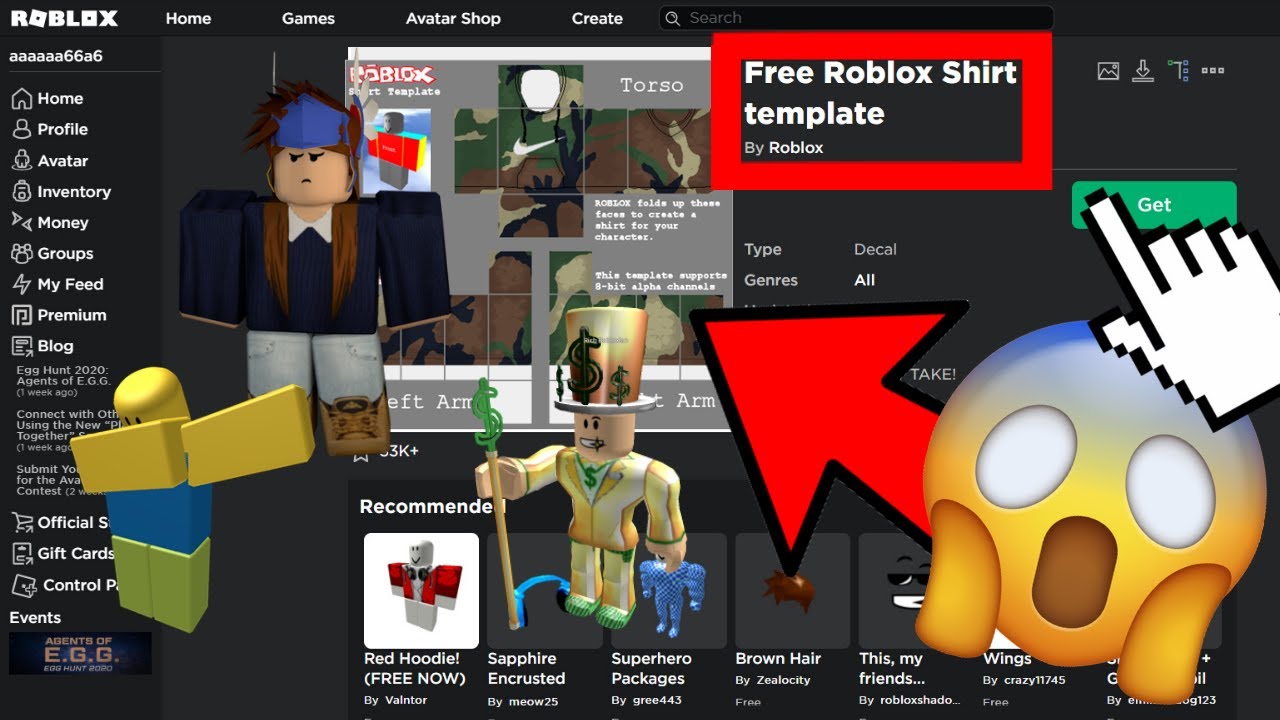
How Do I Download The 2020 Roblox Shirt Template?
Roblox is a children's MMOG that focuses on building games and social interaction. Members of the Builder's Club, a premium membership program that allows kids to design their own settings, can use the shirt template. This shirt template is downloaded to the computer and used to design a personalized shirt for the avatar of the gamer. Other gamers can sell you custom tees as well.
To begin, go to the Roblox website and log in. Go to the page where you can customize your character. In "My Wardrobe," click the "Shirts" button. At the top of the screen, click the blue "Create" button.
In the instructions, click the blue "Shirt Template" link. Save the template image by right-clicking it.
Load the saved template image into a basic paint application. On the shirt template, color, draw, or copy an image. Save the file and return to the Roblox "My Wardrobe" tab once the shirt is complete.
Return to the "Create" button and select "Browse." Click "Create Shirt" after finding your saved template image.

How Do You Put Pictures On Your Shirt On Roblox?

How To Make A Shirt In Roblox (Full Guide) | Make Your Own Roblox Shirt EASILY
Creating A Decal For A T-Shirt
Open a photo editing program. In Roblox, you may design a decal on a T-shirt using any image editor. Photoshop, GIMP, or even MS Paint can be used.
Make a new document. Create a new file in Photoshop, GIMP, or Paint by following the steps below. In the upper-right corner, click File. To begin, select New.
Set the picture to 128 by 128 pixels in size. For Roblox T-shirt decals, this is the suggested picture size. You can enlarge them somewhat, but make sure the image's height and width are the same amount of pixels. To change the measurements, go to the drop-down option next to "Height" and "Width" and choose "Pixels" or "px," then put 128 in the boxes next to "Height" and "Width."
In MS Paint, click Resize in the "Picture" tab at the top to resize the image. Select "Pixels" from the drop-down menu. Uncheck the "Maintain aspect ratio" box, then type 128 after "Horizontal" and "Vertical" in the "Horizontal" and "Vertical" boxes.
Create a T-shirt decal. Design the decal using the program's features. To color the backdrop, use the Paintbucket tool, and to add text to the T-shirt decal, use the Text tool. Brush may also be used to sketch or texture the T-shirt decal. You may also copy and paste an image or pattern from another image onto your T-shirt using the marquee tool. Use your imagination!
Save the document. If you need to alter the image later, it's a good idea to save it in its native Photoshop or GIMP format. To save the image in its original format, follow the instructions below: Select File. Save the file to your computer. Next to "Filename" or "Name," type a name for the file. Save the file.
Using A Template To Create A Shirt
To learn how to make shirts and pants for Roblox, go to https://developer.roblox.com/en-us/articles/How-to-Make-Shirts-and-Pants-for-Roblox.
A web browser's characters. This website offers picture designs for Roblox avatar shirts and pants. To post a shirt design to Roblox, you must have a Roblox membership.
The shirt template may be downloaded here. The shirt template is the picture on the left side of the page labeled "Torso + Arms." To get the template, go through the procedures below: Make a right-click on the picture. Save the picture as Save the file.
In an image editor, open the template. It's best to use a professional image editor like Photoshop or GIMP, which is a free alternative to Photoshop with similar features. To open the picture in Photoshop or GIMP, follow the steps below.
To launch File Explorer on Windows, use "Windows Key + E," or click to open the Finder on a Mac. Locate the image file "Template-Shirts-R15 04202017.png." Select Open With from the context menu when you right-click the file. Select Adobe Photoshop or GNU Image Manipulation Program from the drop-down menu.
Toggle on a new layer in the picture. This is the layer that will be used to design the shirt. Both Photoshop and GIMP include a Layers panel in the lower-right corner. To create a new layer, go to the Layers panel and click the symbol that looks like a blank piece of paper. If you don't see the Layers panel in Photoshop, go to the top menu bar and choose Windows, then Layers.
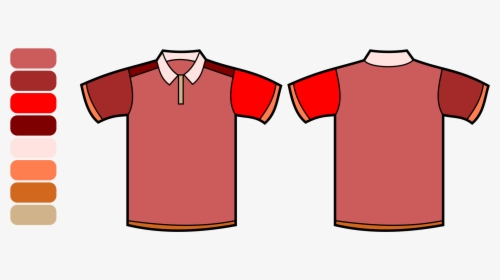
Use the template to color the shirt. The torso, right and left arms, and the shirt template in Roblox are made up of three components. The red fronts are color-coded. Blue color-coding is used on the backs. The lefts are color-coded in yellow, whereas the rights are color-coded in green.
The tops and bottoms are color-coded in light blue and orange, respectively. In both Photoshop and GIMP, you may use the rectangular marquee tool to pick the area you wish to color, then fill it with a color of your choice using the Paintbucket tool.
When coloring your garment, make sure the top layer is selected. The layer containing the template should not be selected. To pick the top layer, click it.
Do not color past the top dotted line on the template for the right and left arms if you want the shirt to have short sleeves.
For the left and right arms, do not color past the bottom dotted line on the template. This gives some room for the hands to move about.
Add a fresh layer to the mix. To add a new layer in Photoshop and GIMP, simply click the symbol that looks like a blank sheet of paper. This is the layer on which you will put your design elements.
Make your own tee. This is where you may let your imagination run wild. You can customize your T-shirt with whatever you like. In Photoshop or GIMP, you may add text on the shirt using the text tool. You may also use the Brush to draw on the garment or add texture to it.
You may also copy and paste an image or pattern from another image onto your shirt using the marquee tool.
On the R15 avatars, which have curved forms, some apparel designs may appear distorted.
Save the document. If you need to alter the image later, it's a good idea to save it in its native Photoshop or GIMP format. To save the image in its original format, follow the instructions below:
Select File. Save the file to your computer. Next to "Filename" or "Name," type a name for the file. Save the file.
How Do I Give My Friend Robux?
You can aid a buddy who isn't nearly as wealthy as you if you've been playing Roblox religiously and have acquired a little fortune. While you cannot just give your friend Robux, you can utilize the mechanism that other players use to "donate" the virtual currency. Players looking for contributions frequently make clothes, generally a T-shirt dubbed a "donate" T-shirt, to sell to other players in return for Robux.
Step 1
Make sure the player to whom you're contributing has a donated apparel item for sale. A paid Builder's Club account is required to manufacture and sell clothes. The player must next publish the clothes to the catalog and select the price.
Step 2
Go to your Roblox account and sign in.
Step 3
In the blue navigation bar, select the "Catalog" tab.
Step 4
In the search window, type the name of the donation apparel item and press "Search." The clothing item's name is decided by the designer.
Step 5
Select the item from the search results by clicking on it.
Step 6
To purchase an item, click the "Buy with R$" button to the right of the item.
About The Authors
Steve MartinsI am a certified graphic designer and I earned my bachelor’s degree in Communication Design. I worked with many brands like Uniqlo and Huawei but also independent smaller Barcelonian brands like Caravelle and Madrid’s Hola Coffee and I have completed over 2000 projects in the last 5 years.