Top 3 Easy And Effective Guides In Making Christmas Gift Tag Template 2021: Microsoft Office Word, Canva, And Google Docs
The printable Christmas tags can be printed on regular computer paper, but we recommend printing them on sticker/label paper or card stock and then creating your tags with a hole punch and ribbon. When printed in black and white, they're acceptable, but when printed in color, they're fantastic.
These printable Christmas gift tags will not only save you money, but they will also save you time from having to buy them at the shop, and they will add a personal handcrafted touch to your gift. After all, Christmas should be all about saving money, time, and showing someone you care.
How Do You Make A Gift Tag In Word?
When it comes to generating lovely paper labels, though, I can't help but go back to my old standby, Microsoft Word. Word is fantastic since it's quite straightforward to use and practically everyone has it, making it incredibly simple to email and share projects. There are probably a million ways to make attractive labels in Microsoft Word, but here's one of my favorites:
Select Your Shape

Starting with a blank document, go to the "Insert" menu, then "Shapes," and select the label shape you want.
Fix Your Outline And Fill In The Settings
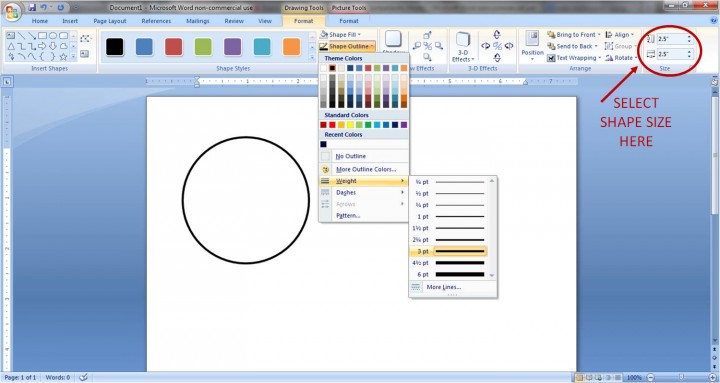
After you've drawn your form to the size you want it to be, you'll want to make it lovely! I normally make the outline of my shape a little thicker so that when I print it out, it is nicely defined. To do so, go to the "Format" tab and select "Weight" from the "Shape Outline" drop-down menu. You can make yours thinner or thicker depending on your desire.
In the "Shape Outline" drop down, you may also modify the color of your outline. While we're at it, let's adjust the fill color as well. The "Shape Fill" option is located just above "Shape Outline." You have a couple of options here. You can choose a solid color to fill your shape.
Alternatively, you may include a pattern within your shape. You can use any photo file on your computer as your shape's background by selecting "Picture" from the "Shape Fill" drop down menu.
Play around with the "Gradient" and "Texture" choices until you find the perfect background.
If Desired, Add A Layer
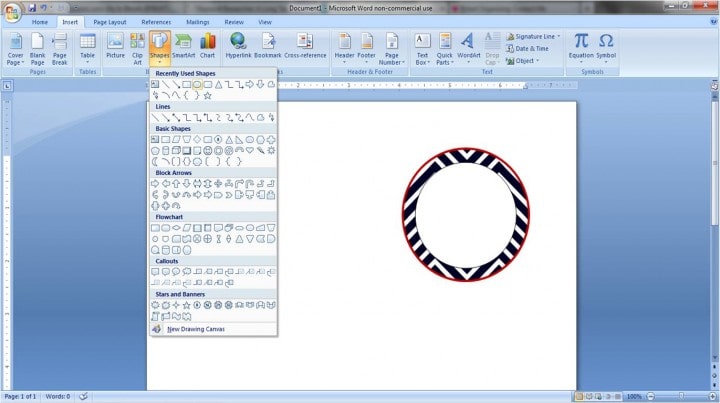
Adding a second layer to your label is always a good idea in my opinion. You get a bright color or pattern in the background, as well as a clean white surface on which to write. You'll use a similar procedure to add a layer: Choose your form from the "Insert" tab, "Shapes" button, and size it appropriately (I went with 2" x 2"). Then change the width of your outline as well as the color of the outline and fill.
Include Your Text
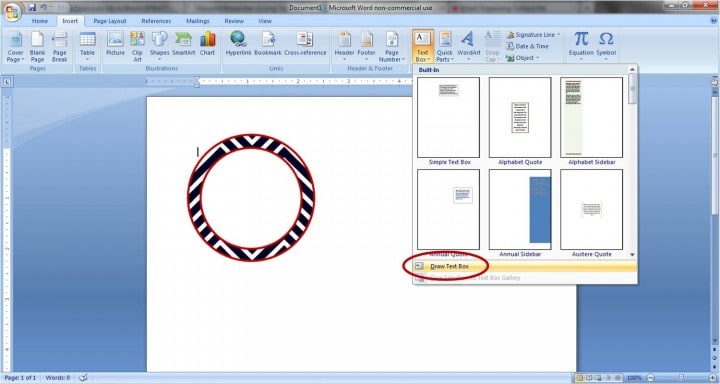
To do so, go to the "Insert" tab and select "Text Box" from the drop-down menu. At the bottom of the drop-down menu, select "Draw Text Box."
Overlay your text box on top of the existing shape. Then you'll want to make the text box transparent so it doesn't obscure the lovely label you've created. Pick the text box, then go to the "Text Box" tab and select "No Fill" under "Shape Fill." For the "Shape Outline," you'll want to select "No Fill."
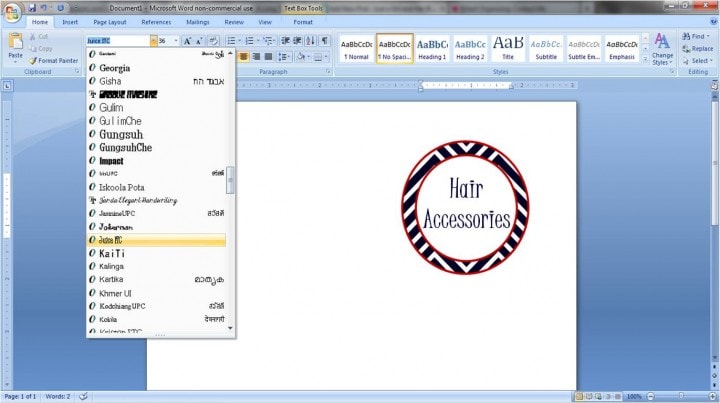
You're ready to type once your text box is transparent. As you would in a typical Word document, type your words and adjust the size, font, and alignment as needed. You can also use color to your advantage!
Your Label Should Be "Grouped"
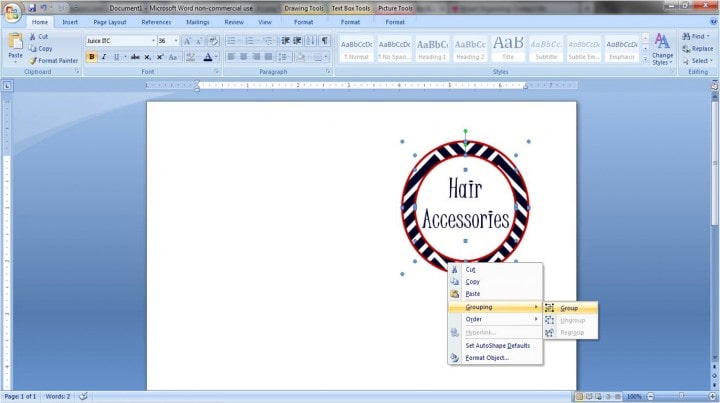
When I have the label just how I want it, the last thing I want to do is group it together. Instead of trying to move each component individually, I can move it across the page as a single unit. To use the group feature, press and hold the "Ctrl" key while clicking on each element of your label to pick them all. This is when things get a bit tough. When your cursor changes to an arrow with a plus sign, you know you're in the correct location to click.
Next, right-click on your selection and select "Group" from the "Grouping" menu.
TA-DA! Your label is now a single entity! You may drag and drop it around the page, copy and paste it, edit the wording, and have a lot of fun with it! Now, for all of you overachievers...
The Extra Round
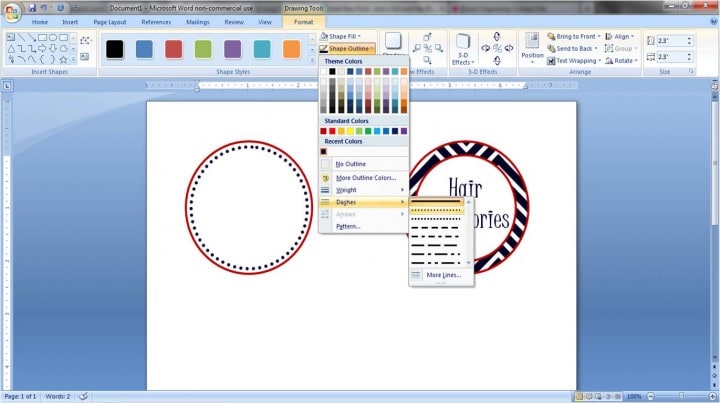
The outline style is also a lot of fun to experiment with.
Go down to "Dashes" for the inner circle's "Shape Outline." You will have the option of using dots, squares, dashed lines, and other shapes. Just another adorable depth to your labels!
Though expensive programs and machines are fantastic, Microsoft Word may be used to create attractive labels. It is, in my opinion, the easiest program to use while still producing stunning, totally customized results.
Getting Your Labels Printed
What's next once you've made your adorable labels? I usually print mine on white card stock and cut them out by hand (using my home inkjet printer). If they'll be in a high-traffic area, I'll laminate them to give them a little extra protection. I usually use tape or velcro dots to adhere my labels, whether they are laminated or not.
If you want to utilize a label that looks more like a sticker, Avery offers a variety of sticker templates. Simply go to their website, find the template that corresponds to the stickers you purchased (you can search by the number on the pack), download the template, and follow the instructions to create your design.
Can You Make Gift Tags On Canva?
Customized gift tags give every item you plan to give to friends and family for the holidays, birthdays, or anniversaries an extra sparkle. Personalize your gifts with your favorite colors and artwork to make them genuinely unique while spreading holiday cheer!
Canva makes it simple to generate beautiful, unique gift tags for your friends and family. Everything you require is within reach. Canva is made to be simple and enjoyable to use. Drag and drag the items you want to use into your canvas, then use the buttons to change the size and wording.
Register Or Log In
Utilize your Facebook or Google account to create a free Canva account. If you've already created an account, simply log in and look for the "Gift tag" design type to get started.
Templates Are Available For Download
You can look through gift tag templates for any theme if you don't want to start from scratch. Gift tags for Christmas, birthdays, anniversaries, weddings, and other occasions are available. Filter by color, layout, and style using the search function.
Features To Look Into
The drag-and-drop feature in Canva allows you to quickly add design components to your page. To help you bring your idea to life, search through millions of high-quality stock pictures, drawings, icons, and other graphics.
Customize Your Design
Choose your own color scheme, backdrop, and font style to personalize your design. To brighten your photos, use the photo effects tool. Use images, artwork, or personal branding aspects that you have.
Print Or Download
Save your gift tag as a PNG or JPG and share it online once you've completed your design. Make high-quality prints with Canva Print by downloading as a print-ready PDF.
How Do You Make A Gift Tag On Google Docs?
How to make labels in Google Docs?
This video demonstrates how to use our Labelmaker add-on to create and print a full page of labels within Google Docs. If you're printing labels for a mailing list, there's a similar guide for Google Sheets. Depending on your use case, there are a variety of alternative manuals and tutorials available.
Create A New Document
Create a new Google Docs document and leave it empty. That document will be used to develop and print labels.
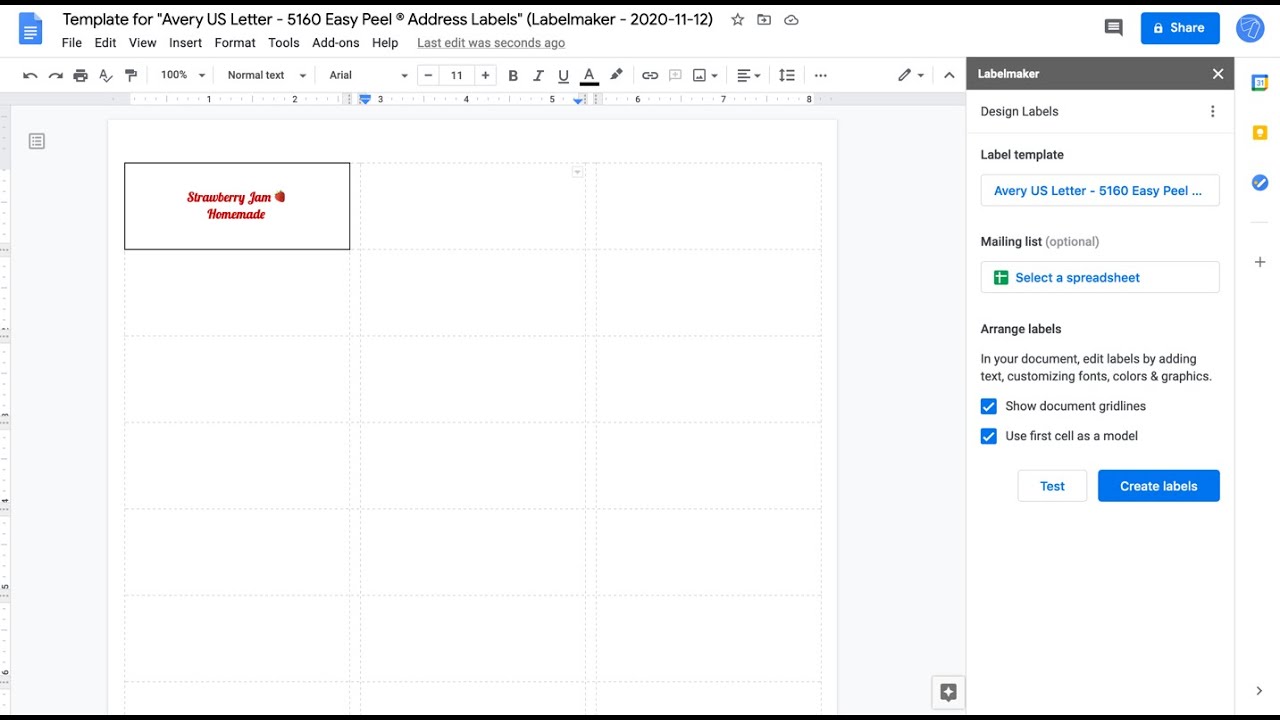
Maker Of Open Labels
Select "Create & Design Labels" from the "Add-ons" menu in Google Docs. Make sure to install the add-on first if you don't already have it. Reload your document after the installation by closing and reopening it.
Choose A Design Template
Click "Select a template" on the Labelmaker sidebar, then scroll through the list of available templates. As of this writing, there are over 5000 labels available in several categories, including "Avery® US Letter," "Avery® A4", "Avery® Zweckform," "Sheetlabels.com," "OnlineLabels.com," and "Herma."
Edit Document
Edit the document by adding text and formatting to the first cell. This cell will be duplicated across all of the labels. If you've linked a mailing list, you can use double-arrows to add merge fields. Add the address with address>> and the city with city>>, for example.
Replicate The First Cell
To generate a new document with a full page of labels cloned from the initial label, click "Create labels." Uncheck the box "Use the first cell as model" and create labels if you don't want to reproduce the first cell.
Open A New Document
To view your labels sheet, click "Open document."
Before Printing, Take A Look At The Preview
Verify that your labels appear to be what you expected. If you need to make changes, return to the previous document, make your changes, and then click "Create labels" to generate a new sheet of labels.
Print Labels
When your paper is complete and your labels appear to be correct, select "File" > "Print." Set the margin to none and the scale to 100 percent in the print dialog box. The size of the page may need to be adjusted depending on the format of the label's product. The size of Avery® US Letter 5160, for example, must be "Letter."
About The Authors

Steve MartinsI am a certified graphic designer and I earned my bachelor’s degree in Communication Design. I worked with many brands like Uniqlo and Huawei but also independent smaller Barcelonian brands like Caravelle and Madrid’s Hola Coffee and I have completed over 2000 projects in the last 5 years.